Visualizing Product Development Using Obsidian Canvas and Excalidraw
Discover how using Obsidian Canvas in combination with Excalidraw can make visualizing your product development cycle a breeze.


With version 1.1, Obsidian released it's Canvas product to the masses. Until recently I hadn't found a reason to use it, but I thought that it might be a useful tool for visualizing and sharing the individual stages of the product development cycle and recently gave it a go.
Here's what that might look like:
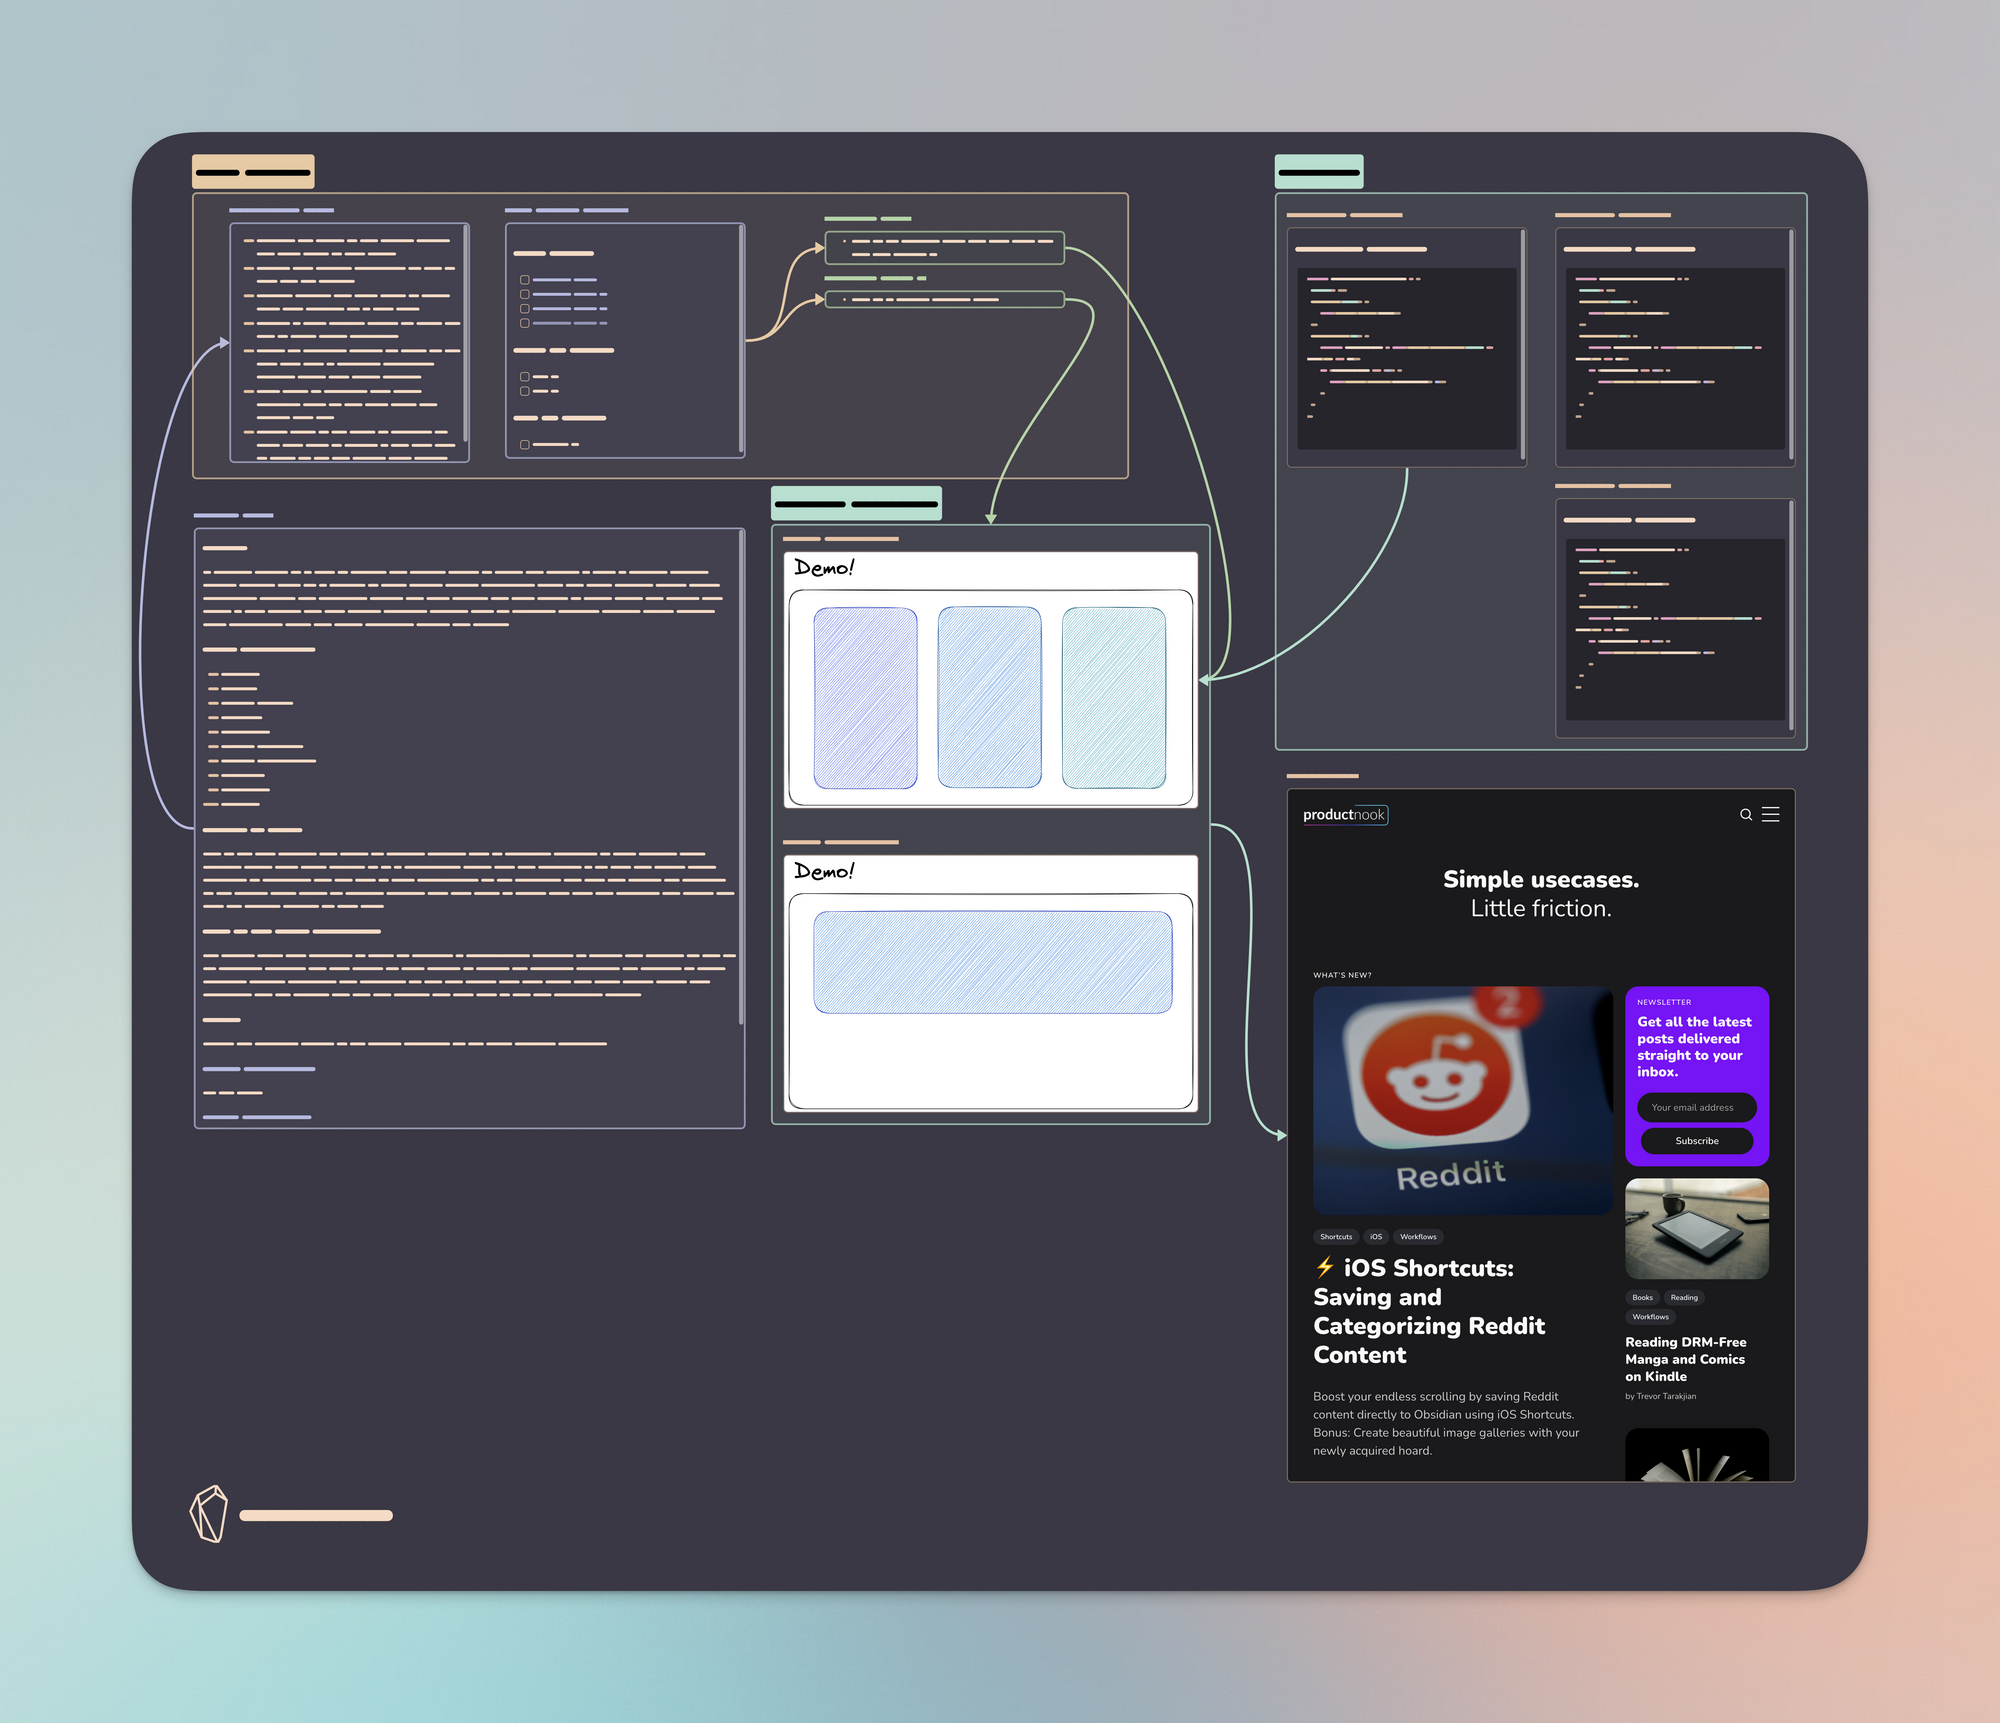
These colorful boxes mean something, I promise! Let's get into what you might want to include.
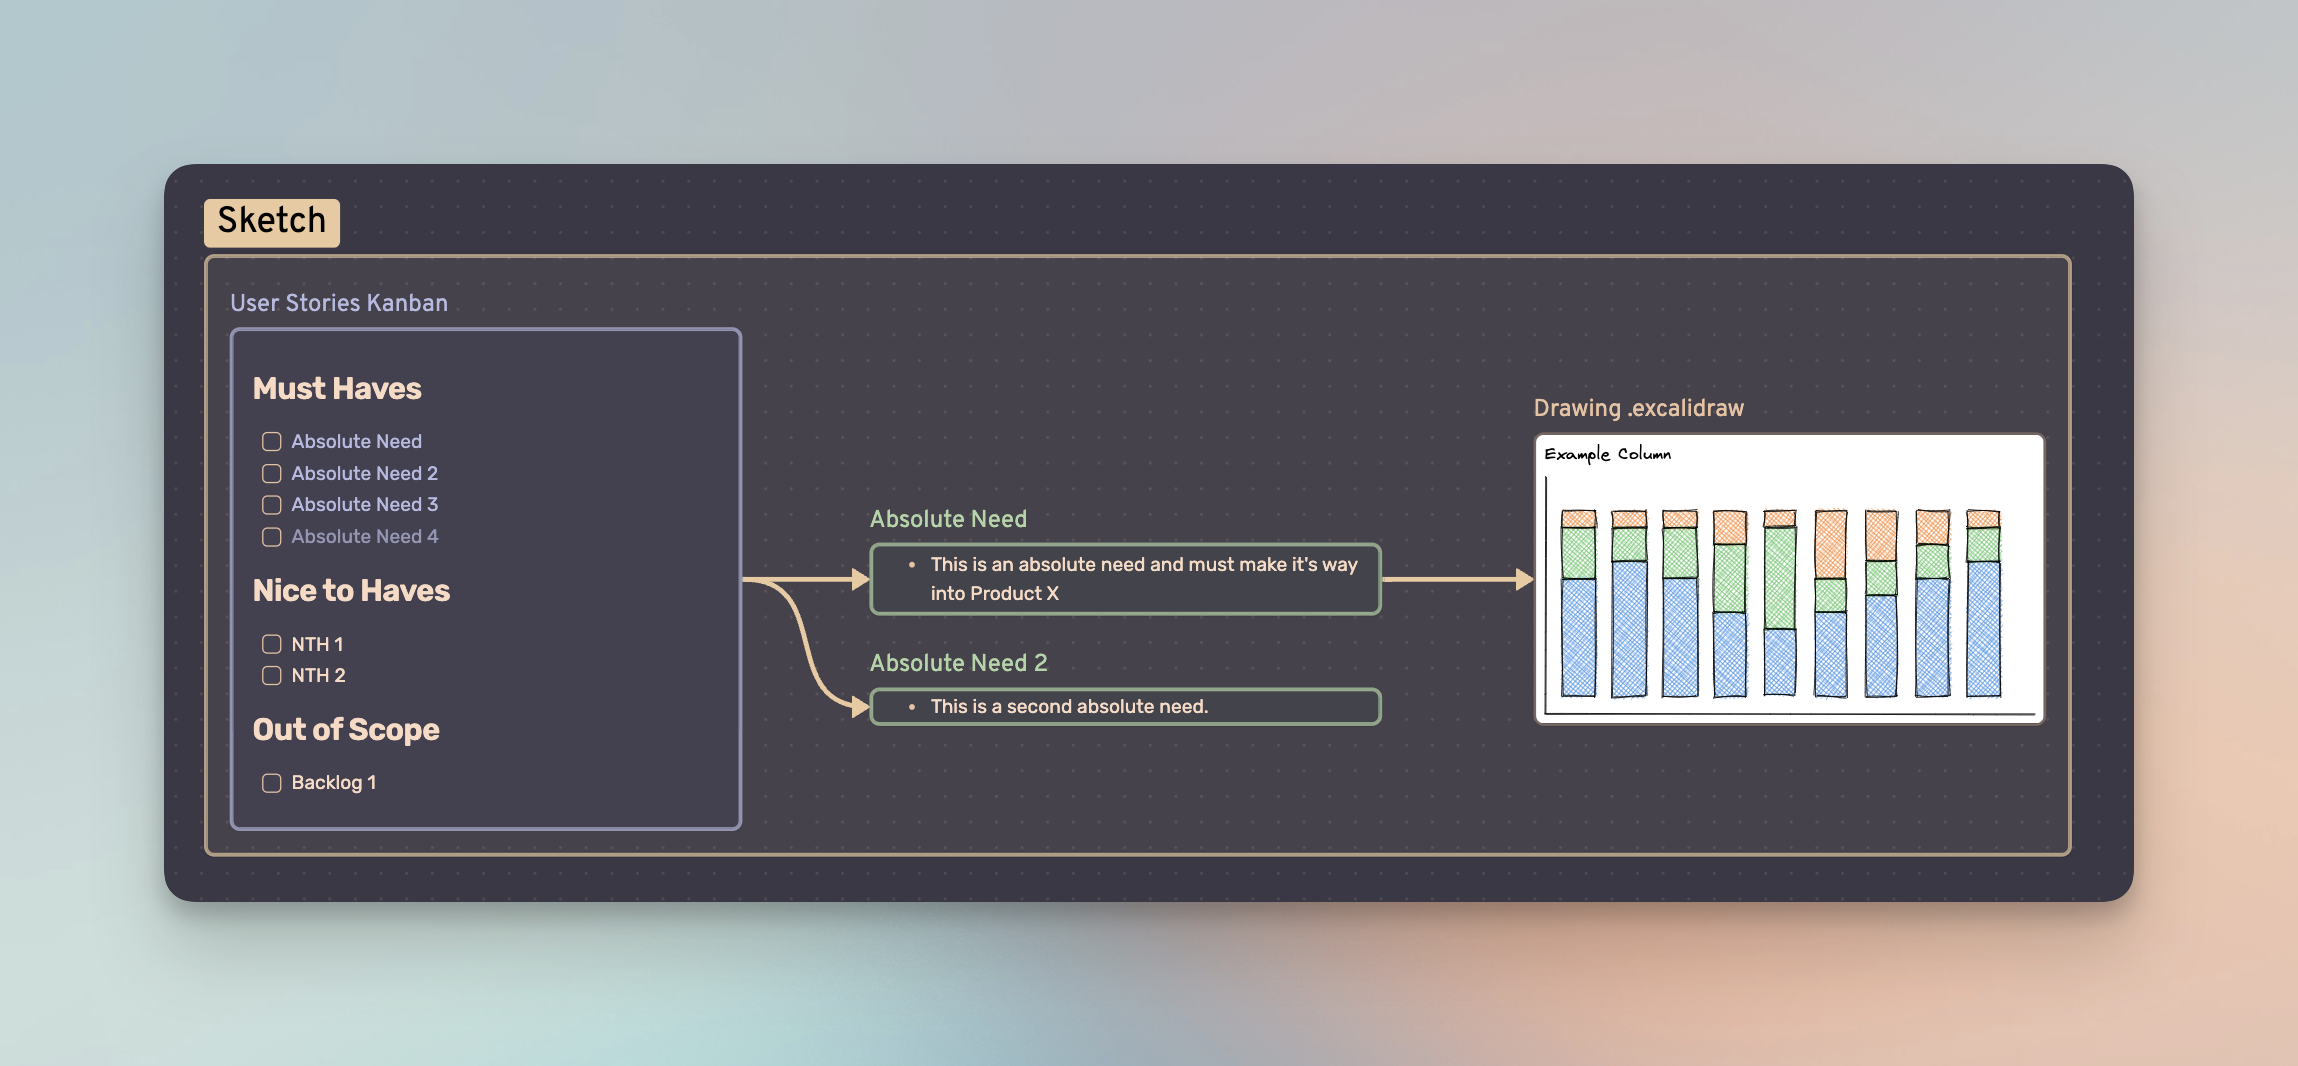
User Stories
My product workflow often begins with grouping feedback from users. Typically, I'll house everything under one note, and then break it out based on the strength of their corresponding value propositions, with a rough estimate of the amount of users who would benefit from its development. With that in mind, I'll create a Kanban and nest the stories under the following categories:
- Must Haves
- Nice to Haves
- Out of Scope
I then link each story to its own separate note, so that in Canvas you'll end up with something similar to this (only two are linked here):
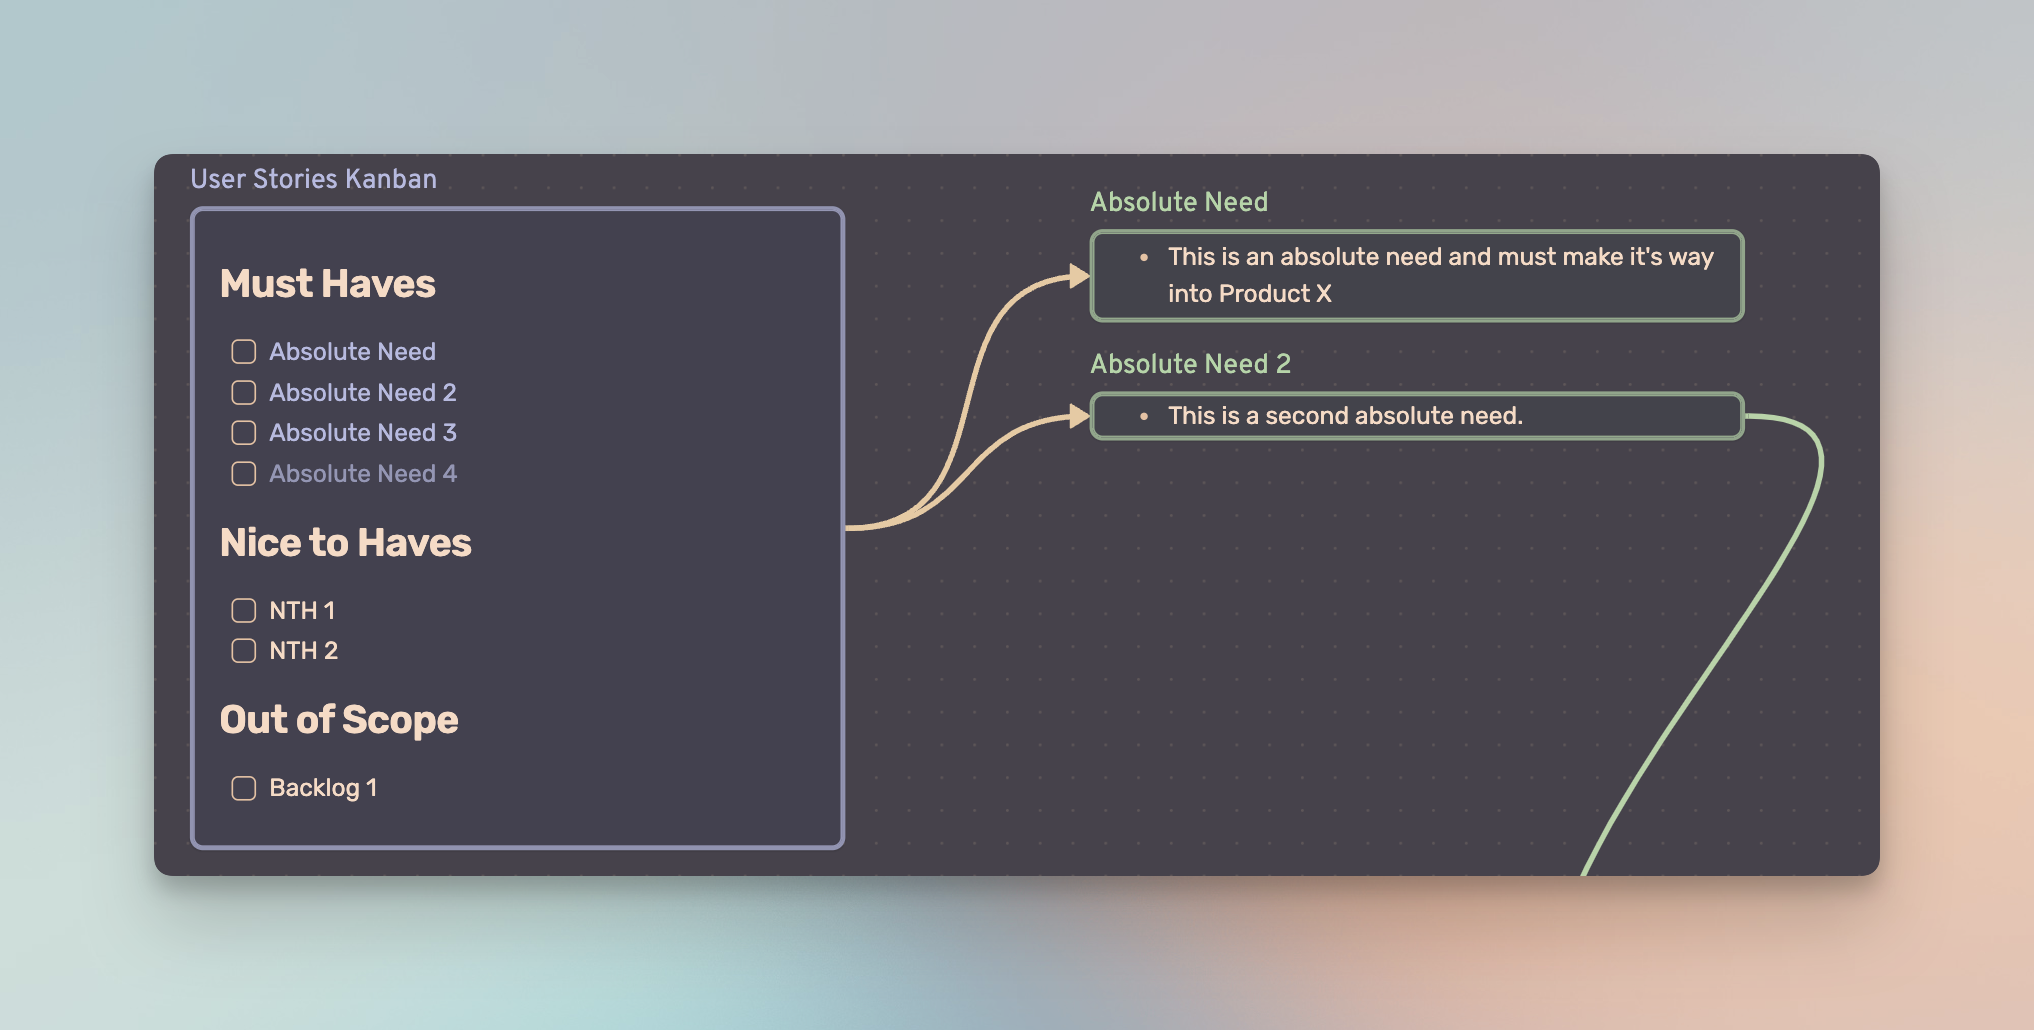
The benefit of taking the time to create these individual notes is that you can always refer back to them when pruning your backlog. In my opinion, capturing that in-the-moment context is crucial to later product iterations and avoids additional touch points.
Documentation
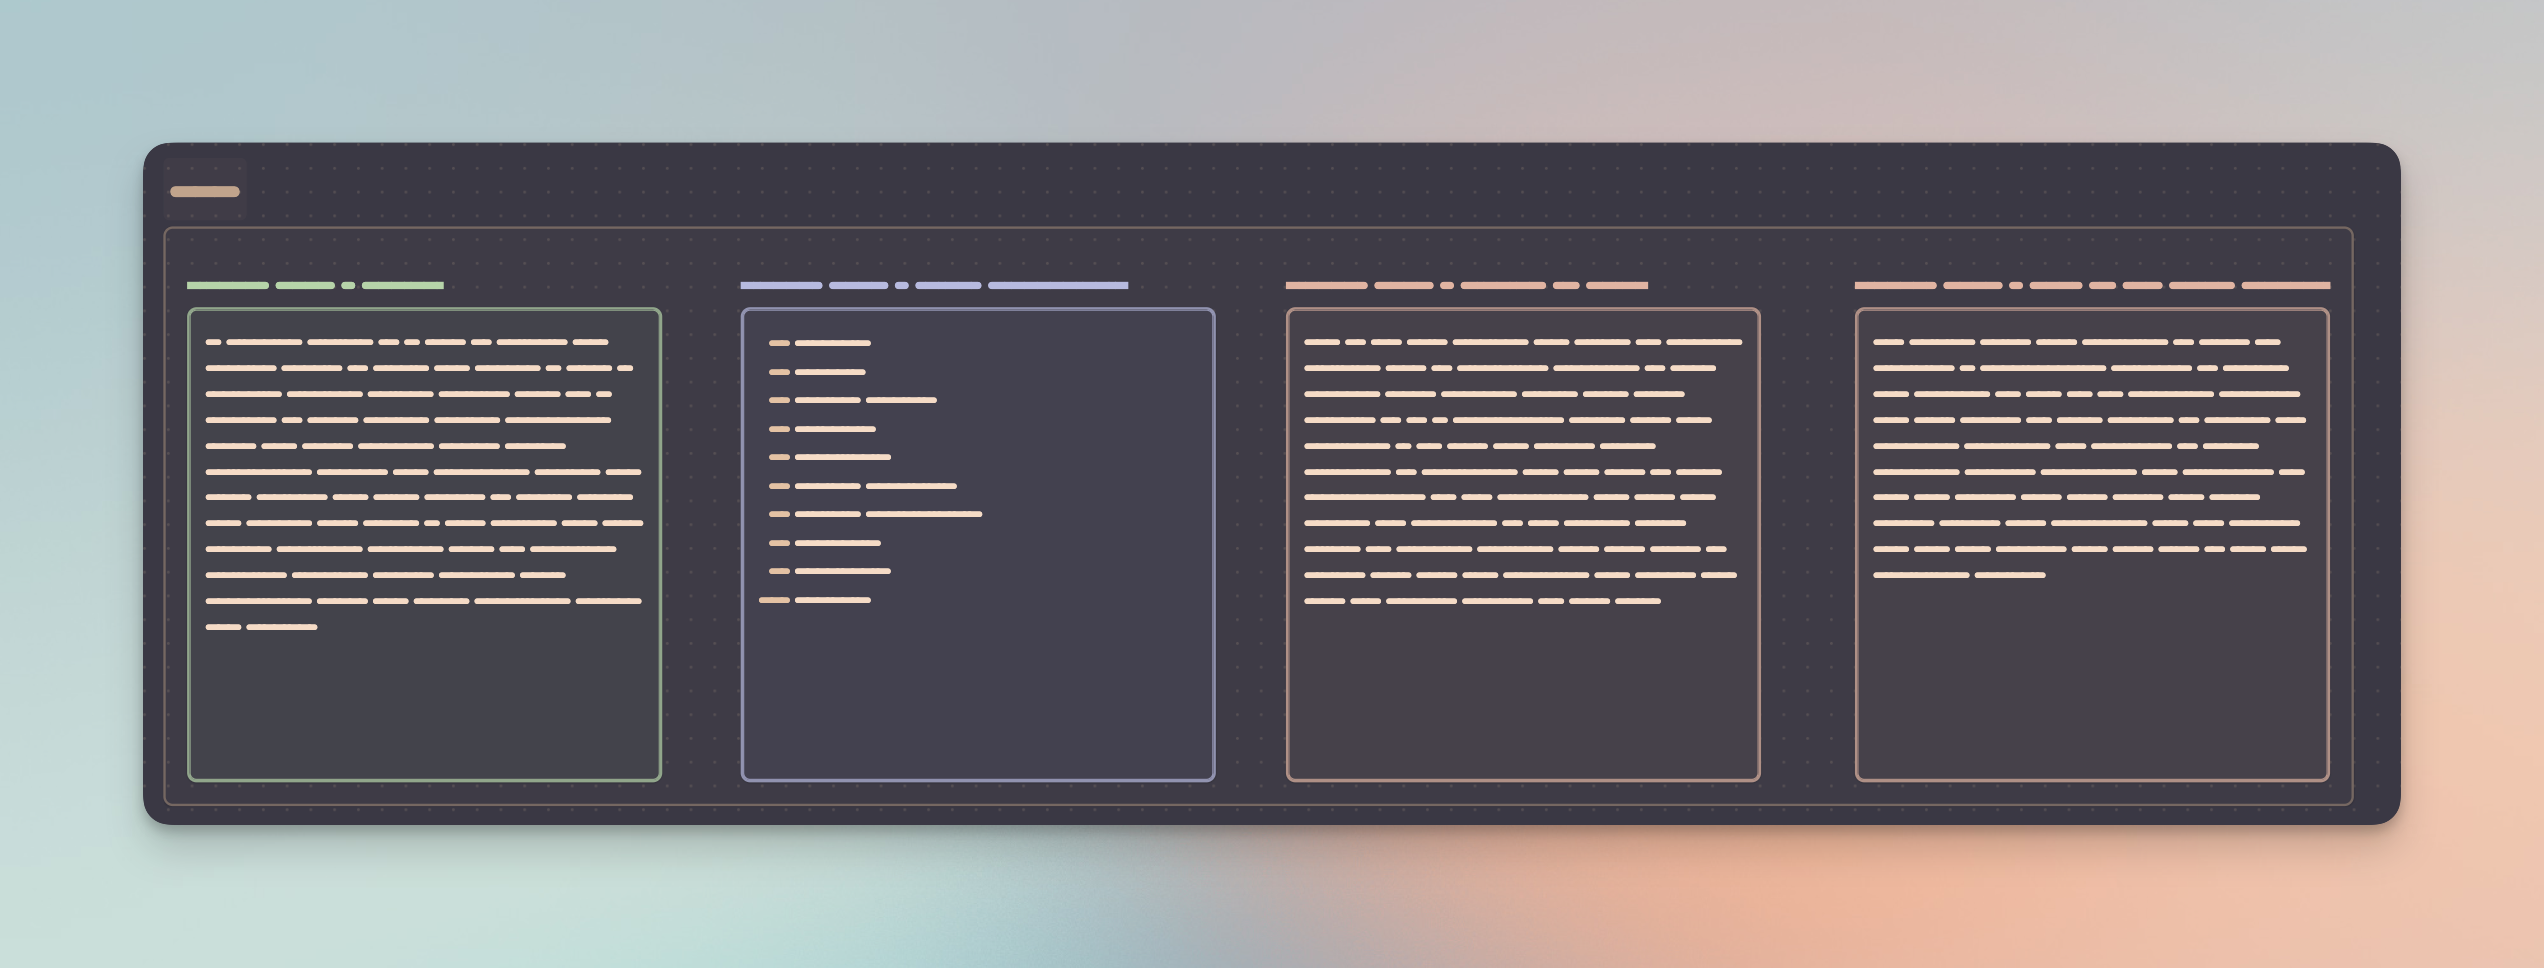
You can add anything you want in terms of documentation to your Canvas, but for example's sake I've included some hybrid version of a traditional PRD (Product Requirements Document) and a separate note that contains information about product feasibility and technical limitations. The latter could also be in the PRD, but sometimes it's nice to keep things separated based on their function.
If your documentation is large, you might want to display each header as a separate element of the canvas. With the Narrow to Section feature, this is pretty straightforward (and awesome):
- Drag your PRD note into the Canvas as many times as there are headers.
- For each one, right click the element and select "Narrow to Section".
- Choose the header you want displayed.
What you should see afterwards is the following:
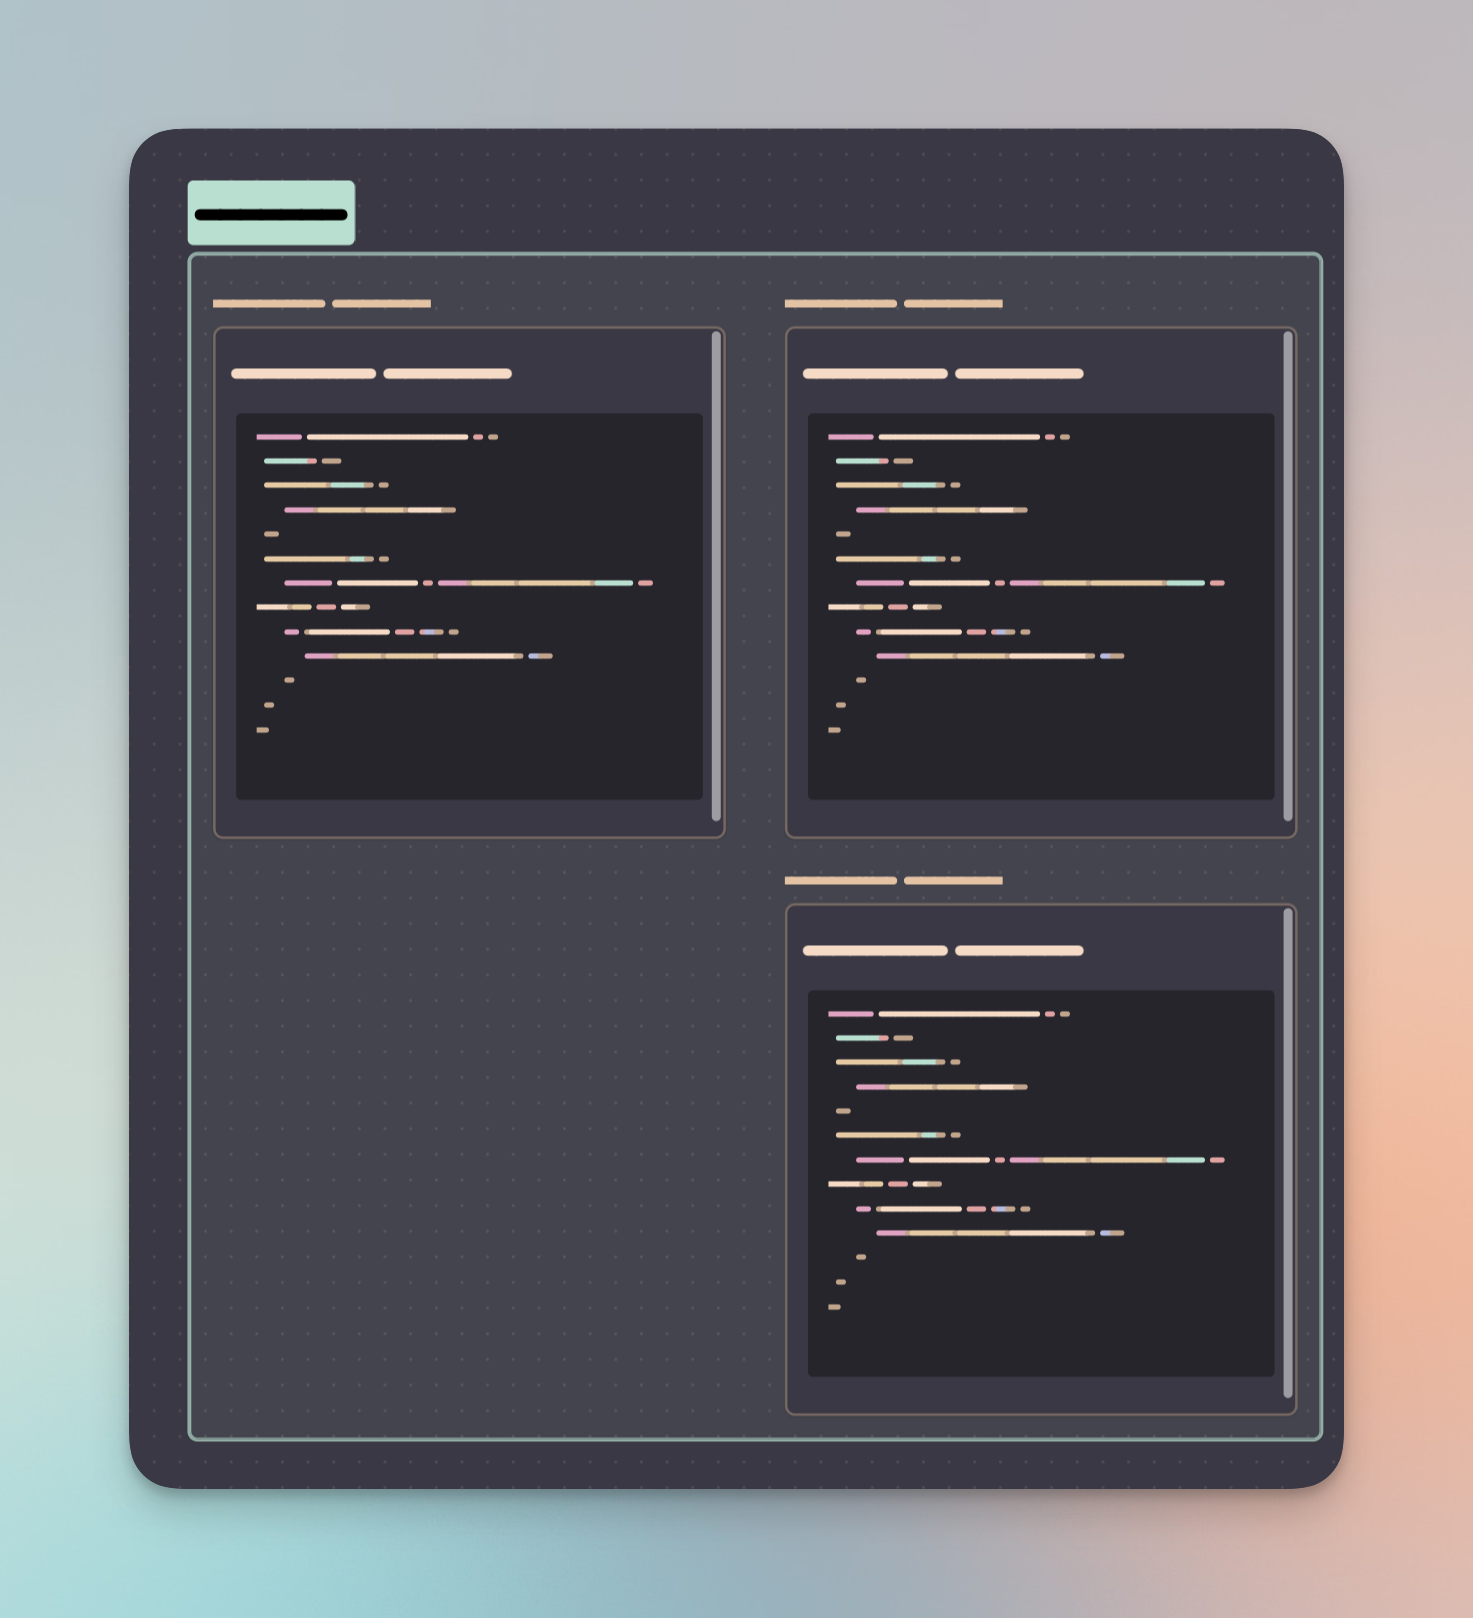
Code Blocks
Functionally, Code Blocks operate the same way as any other type of element. If you're writing or maintaining technical documentation during development, you can use the same Narrow to Section to display code snippets in Canvas from those notes.
I would also recommend downloading the Editor Syntax Highlight plugin available on Github so that your snippet styling is based on the language used.
Of course, you might argue that this is completely pointless to showcase, but if you're a TPM then this might be somewhat useful for breaking out and visualizing the work in chunks.
Using Excalidraw
Excalidraw is a fantastic, light-weight sketching platform. Like any sketching tool, it's a great way to convey user stories, ideas, and models. I've had a good amount of success using sketches during the development of the product spec, and it has reduced a good amount of unnecessary back and forth when it comes to product implementation and, potentially, QA.
Excalidraw is available as a web app but it is also available as an Obsidian plugin. The latter enables a more efficient workflow as the former involves creating and saving individual files and manually adding those as embedded images to your Obsidian Vault. The plugin allows you to create .excalidraw files directly in Obsidian, and any changes made are both saved automatically, and reflected in Canvas, should they be added in.
For example, you may want to pair a user story from before and link it to something you sketched out in Excalidraw. You can of course use images as well to convey something similar.
Personally, I'm hoping that Canvas builds Excalidraw tooling directly into Canvas so it's one less plugin I have to worry about, but it works well enough for now. For larger products or more involved user stories, Excalidraw has been invaluable in getting my point across.
Extras
Putting all of these elements together makes for a great springboard for product ideation and an extremely clean method to visualize the product development cycle. I also hope that it's inspiring, in a way. There are many usecases for a tool like Canvas, and this is only one of them, but considering this is basically Version 1.0, I'm quite excited to see where the Obsidian team takes Canvas in 2023.
Additional tips for Canvas can be viewed on the Canvas landing page.


Discussion